Setting Up an Apple Mail Account in Yosemite
Before you can configure email software to send and receive email from our servers, you must create an email account in your control panel.
Once you have done this, you can configure your Apple Mail to connect to the email account you created on our servers.
1. Click Mail on the menu bar
2. Select Add Account
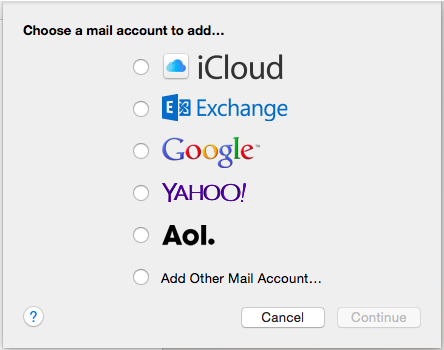
3. Select the radio button next to ‘Add Other Mail Account’ and click continue.
4. Next you’ll be asked to fill in your email credentials
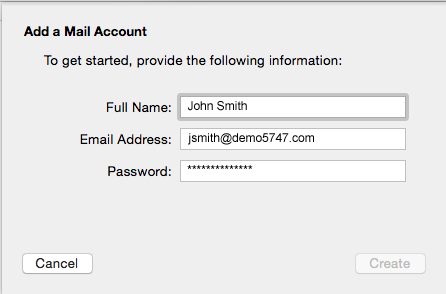
Complete the following information:
Full Name: The name displayed to the email recipient
Email Address: The email account you wish to connect to
Password: Email account password
5. Click the Create button
6. Next, you’ll be asked to enter your incoming mail server details
Complete the following information:
Account Type: Select IMAP
Mail server: Enter the full name of the server that hosts your account. This is located in your in your welcome email , titled “New Hosting Account Information” .
User Name: The email address of the account you wish to connect to
Password: The password used for this email account
7. Click Next
You may get another warning message about Apple Mail not being able to verify the identity of the server you are attempting to connect to. Simply click [Connect] to continue

8. You will now be asked to provide additional information about the incoming mail server:
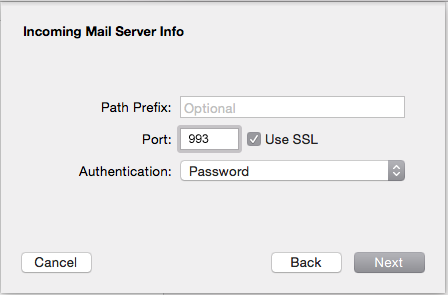
Complete the following information:
Path Prefix: Option Field you may leave blank
Port: Your incoming mail server port is 993
Select the Use SSL tick box.
Authentication: Password
9. Click Next, you will be then asked to enter in your outgoing mail server details.
Complete the following information:
SMTP server: Enter the full name of the server that hosts your account. This is located in your in your welcome email , titled “New Hosting Account Information” .
User Name: The email address of the account you wish to connect to
Password: The password used for this email account
10. Click Create.
11. You will now be asked to provide additional information about the incoming mail server.
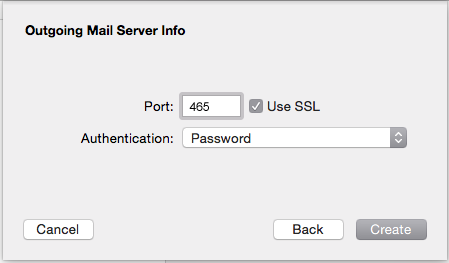
Complete the following information:
Port:465.
Select the Use SSL tick box.
Authentication: Password
Note: Be sure that your computer’s firewall or anti virus software is not blocking these ports as this can cause the ports to not work properly. It is not always necessary to use your Internet Service Provider’s settings, but if you cannot send from port 465, then we suggest you contact your ISP and ask for their outgoing mail server name.
12. Click Create.
13. Close the Mail application and re-open it.
14. Click on Mail and then select Preferences
15. Select Accounts and then click on the account you want to edit, then click ‘Advanced‘
16. In the pop up window, uncheck ‘Automatically detect and maintain account settings‘
17. Click on Account Information
18. Click on the Outgoing Mail Server(SMTP) server list and select ‘Edit SMTP Server List‘
19.Click on the SMTP server you are using for this account
20. Click on ‘Advanced‘ and uncheck ‘Automatically detect and maintain account settings‘
21. Click OK and close the accounts window
You are email is now setup, we recommending testing it by sending yourself an email.
Trouble shooting: Apple Mail Problems After Upgrading to OS X Yosemite
There have been issues with the latest update to Apple Mail program, Yosemite, which is causing issues with customer accounts, resulting in the program itself breaking or locking users out.
The instructions below should help with customers unable to connect to their email servers through Yosemite Apple Mail:
- Start by closing Apple Mail
- Verify that you’re using the correct username and password by simply logging into your Webmail on the remote server (yourdomain.com.au/webmail)
- Go back to Apple Mail : You will need to remove the SMTP (outgoing mail server) password from your Keychain, to do this:
- Go to Applications -> Utilities -> Keychain Access
- In the Keychain search bar enter the name of your SMTP server
For Cloud this would most likely be mail.yourdomain.com.au or fastdotserver.com - Delete all of the relevant password entries for your SMTP server(s)
- Open Apple Mail again, click on Preferences -> Accounts, select your email account
- Select your SMTP server from the Edit SMTP Servers list, and re-enter the password(s) you’ve just deleted
- If this doesn’t work, backup a copy of your emails
- Go to Preferences > Accounts, delete the account, including the SMTP (Outgoing) server
- Then follow the beginning of this guide to set up your email account again