
How to Turn on WordPress Error Log and using Debug Mode
- 1 How to Turn on WordPress Error Log and using Debug Mode
- 2 When should you set up a WordPress error log?
- 3 How to set up a WordPress error log
- 4 How to use a WordPress error log plugin
- 5 Checking your WordPress error logs
- 6 How to fix issues that you discover in the error log
- 7 What is the 500 internal server error
- 8 How to resolve 500 internal server error
From conflicts between WordPress plugins to poorly coded themes and mistakes in custom coding, several problems sound the alarm with website error codes and warnings. Even if you’re not sure what the warnings mean, you must fix them. The first step is learning how to set up a WordPress error log.
As a short explanation, a WordPress error log is exactly what it sounds like: a list of error codes and times that occur on your website.
In this post, we’ll show you how to set up and work with WordPress error logs using the built-in WordPress debug mode.
When should you set up a WordPress error log?
Consider setting up a WordPress error log in the following situations:
- When you see a blank screen while trying to load your website.
- When a warning with an error code (401, 404, 500, etc.) appears.
- If your entire site crashes.
- If you’re noticing slow website performance.
- If a plugin or theme isn’t working properly.
- If you’re curious as to which plugins or themes are causing performance issues.
How to set up a WordPress error log
As is often the case with WordPress, you have two routes to enable error logging with WordPress debug mode:
- Manually
- With a plugin
We’ll start by showing you the manual method, which just involves adding a few code snippets to your site’s wp-config.php file.
Then, if you want an even simpler option for error logging, we’ll share a free plugin that can get the job done.
Here’s how to do it manually:
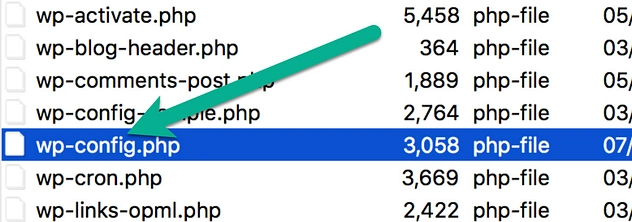
Step 1: Access and edit the wp-config.php file
If you’re not familiar with your wp-config.php file, it’s one of the core files for holding important configuration details, like the credentials for your site’s database.
To access the wp-config.php file, either download and use an FTP client or a file manager tool in your host’s cPanel.
How to use FTP to connect to WordPress
For this tutorial, we’ll cover the steps to access and edit your wp-config.php file with an FTP client.
In your FTP client, locate the wp-config.php file. This is normally in the root site directory.
Upon finding the file, right-click on it and select to edit or view the file. You’ll want to open the file in a text editor.
Step 2: Add a line of code in the wp-config.php file to turn on debug mode
Inside your text editor, search for a line of text that reads Stop editing! Happy blogging.
Place your cursor on the empty line above that line of text.
Paste in the following code:
define( 'WP_DEBUG', true );If you already notice this line of code in the file, it may currently be set to false. If that’s the case, switch it to true.
Afterward, save the file to your computer and upload the wp-config.php file as an update to your website. This is done through the FTP client.
Great! Now debugging mode is activated for your WordPress site.
Step 3: But wait! I don’t want the errors to show on the frontend of my website
If you took a moment to check your dashboard or the frontend of your site, you may have already seen WordPress errors listed for everyone to see. This may not seem like a big deal if they show up on the WordPress dashboard, but you definitely don’t want the warnings on the frontend.
Not only is publicly displaying errors confusing for your visitors, but it can also be a security risk because it gives them detailed information about your site.
In short, debugging mode is messy when activated by itself.
Therefore, we need to log the errors in WordPress so they are recorded but not publicly displayed.
To log your errors, go back to that exact same wp-config.php file in the text editor.
Look at the debug code you recently pasted into the file. Paste the following new code on the empty line below the debug code:
// Enable Debug logging to the /wp-content/debug.log file
define( 'WP_DEBUG_LOG', true );

// Disable display of errors and warnings
define( 'WP_DEBUG_DISPLAY', false );
@ini_set( 'display_errors', 0 );
Again, in some situations you might discover that the debug log code is already included. For that, simply make sure that the false at the end of the code is changed to true.
The first line tells WordPress to save error messages to a file called debug.log. The second snippet tells WordPress not to publicly display error messages.
Now, your error messages will be safely saved in the log file, but neither you nor your visitors will have to see error messages while browsing your site.
For a second time, save the wp-config.php file in your file editor and upload it back to your WordPress website.
How to use a WordPress error log plugin
If you don’t feel comfortable working directly with your site’s configuration file, you can also use the free WP Debugging plugin:

As soon as you activate the plugin, it instantly activates WordPress debug mode and enables error logging. It also lets you control whether or not to display debug messages on your site by visiting Tools -> WP Debugging.
Checking your WordPress error logs
We’re assuming you already know the website pages that are alerting you of errors.
You must visit these pages now that the debugging log is configured and ready to store the errors.
Reconnect to your website files using the FTP client. You can also connect via your host’s cPanel.
Go to the /wp-content/ folder.

Open that folder and look for a file called debug.log.
This is the file you created from the previous steps.
What should I do with this debug log file?
The debug.log file is accessible by editing, viewing, or downloading the file. It’s similar to the previous steps, where you might either just preview the file to look at it or open it in a file editor to make changes and save it for later.
Overall, a debug log file is for reference, not for editing. Therefore, you have to sift through the list of errors and warnings to identify what’s wrong with your site, theme, plugins, or code.
For most people, the error log codes mean nothing. If anything, it’s closer to gibberish than English. However, you don’t want to forget about those errors.
Your resolution steps should go like this:
- You identify an error with the debug log.
- You find the error code.
- You look up what that error code means.
- You utilize a separate guide to fix that error.
How to fix issues that you discover in the error log
Unfortunately, there’s no one-size-fits-all approach to fixing problems that you might discover in your site’s error log.
500 Internal Server Error – How to fix it in WordPress
Internal server errors in WordPress are the worst (aka. http error 500), compared to other HTTP error codes and status codes. They provide no real information about the problem and are rarely actual server errors (ie: usually your server is working fine).
In this article, I’ll try to make sense of this internal server error in WordPress and show you how to get rid of it:
What is the 500 internal server error
The web definitions of the 500 internal server error are rather unclear. Basically, there’s no real indication as to what really went wrong and caused the error.
The only thing that’s certain is that the error is caused by some operation that went wrong on the website’s end. Particularly in WordPress’ case, this can mean that a script that’s part of a theme or a plugin did something it shouldn’t have done, and now your server has crashed.
Don’t sweat, though, there are some good solutions…
How to resolve 500 internal server error
Most of the time, you can have the 500 internal server error solved in 6 steps:
1. Turn on debugging
Whenever WordPress throws you a white screen of death or a server error, I recommend turning your debugging on. While this may not fix the problem, it may give you more insight into what’s going on.
You can turn debugging on by editing your site’s wp-config.php file. Once you’ve accessed this file, search for WP_DEBUG within. If you find it, you should be able to set it to “true”. If you don’t see it in there, you’ll need to create it yourself. Either way, at the end of the day, you should have a line that looks like this:
define( "WP_DEBUG", true );Once saved, reload your site to see if anything has changed. If you’re lucky, the server error may disappear and might be replaced with a different error, one that actually tells you where the issue is.
If this is the case, take a look at where the error is located. If it is within a plugin folder, disable that plugin, the error should go away.
Even if turning on debugging doesn’t give you a great result, it is a good idea to leave it turned on until the issue is resolved. It will give you and any developers more insight into what’s going on. Don’t forget to turn debugging off once everything is a-ok and you’re done with the maintenance!
2. Deactivate all plugins and switch themes
If you have access to your dashboard, you should deactivate all your plugins and see what’s what. If your website loads without the server error the issue was with one of your plugins. You can switch them on one-by-one to figure out which one caused the issues.
You can also switch your theme to a default, unaltered WordPress theme like Twenty Fifteen or Twenty Sixteen. If the site loads without the internal server error, the issue was within your theme.
I’ve noticed that quite a few of these errors are actually caused by plugins, so this will be your best bet.
3. Check your .htaccess file
The .htaccess file, if it exists, contains a number of rules that tell the server what to do in certain circumstances. It is commonly used for rewriting URLs or preventing access to your site for malicious intent.
Use your FTP editor and check if you have an .htaccess file in your WordPress root folder. You may need to make sure your FTP editor lists hidden files before you do this.
If there is an .htaccess file there, make a backup and then delete all the contents within, or the whole file. This may remove some important rules, but if the internal server error was caused by a mistake within the file, this will tell you.
If the error is now resolved, the issue was with the .htaccess file. Try restoring the file and then deleting blocks of it. If at some point the site starts working, you know which block the issue is in. You can narrow it down to a single line like this usually. You can then remove that line or ask your developer or your host for further assistance.
4. Increase your memory
I’ve never personally run into this issue, but I’ve heard that increasing your memory limit may help – I assume this is more of an issue in shared environments. To get this done, open your wp-config.php file in the WordPress root directory and search for WP_MEMORY_LIMIT. If it exists, change the value to something like “64M”. If it doesn’t, paste the following line into the file:
define('WP_MEMORY_LIMIT', '64M');If this works then you’ve only solved the issue temporarily. Chances are that you have a faulty bit of code somewhere (which could be a third party plugin) that is exhausting your resources. If your host has monitoring available, take a look at your resource usage with various plugins on/off to get a better idea of what is wasting those precious megabytes.
5. Reinstall WordPress
I shouldn’t think this would help in most cases, but there are some edge cases where a reinstall of WordPress could fix the issue. It may even fix file permission problems along the way.
Summary
Internal server errors in WordPress are usually not caused by actual server faults. Most of the time, they can be corrected relatively easily using the methods described above. If in doubt, always ask your host, they have far more sophisticated tools than you do to locate and fix issues.


